Generative AI PC Build Log
Why
With the emergence of generative AI, I finally had a compelling reason to build a new PC. Most deep learning projects require a dedicated GPU, making them difficult to run even on an M1 MBP. While cloud options like Paperspace and Colab exist, the GPUs they provide access to are limited. Paperspace, for instance, only allows access to the most basic GPU and denied my request for access to the RTX 4000. AWS was also an option, but it was somewhat inconvenient to use cost-effectively since you would have to stop the instance and snapshot the volume to save on costs. Having a local GPU is crucial to quickly run experiments at a small scale before deploying them to the cloud to run on bigger hardware. This helps me minimize the feedback loop and make faster progress. I had previously built a computer a couple of times in high school, mostly for gaming. I didn’t have a good reason to do it again until now.
Another option would have been to buy a pre-built RTX 4090 rig, which would have been easier. However, it would have provided less value for the money, with cheaper components. By building my own computer, I was able to get twice the amount of RAM, a larger SSD, and a nicer case for the same price as the pre-built option. Additionally, building my own rig provided a learning experience and made me more comfortable with changing out parts if necessary.
Build Specs
- CPU: Intel Core i9-13900K 3 GHz 24-Core
- RAM: G.Skill Trident Z5 RGB Series (Intel XMP) 64GB (2 x 32GB)
- GPU: Gigabyte RTX 4090
- Power supply: 1000W Corsair modular power supply
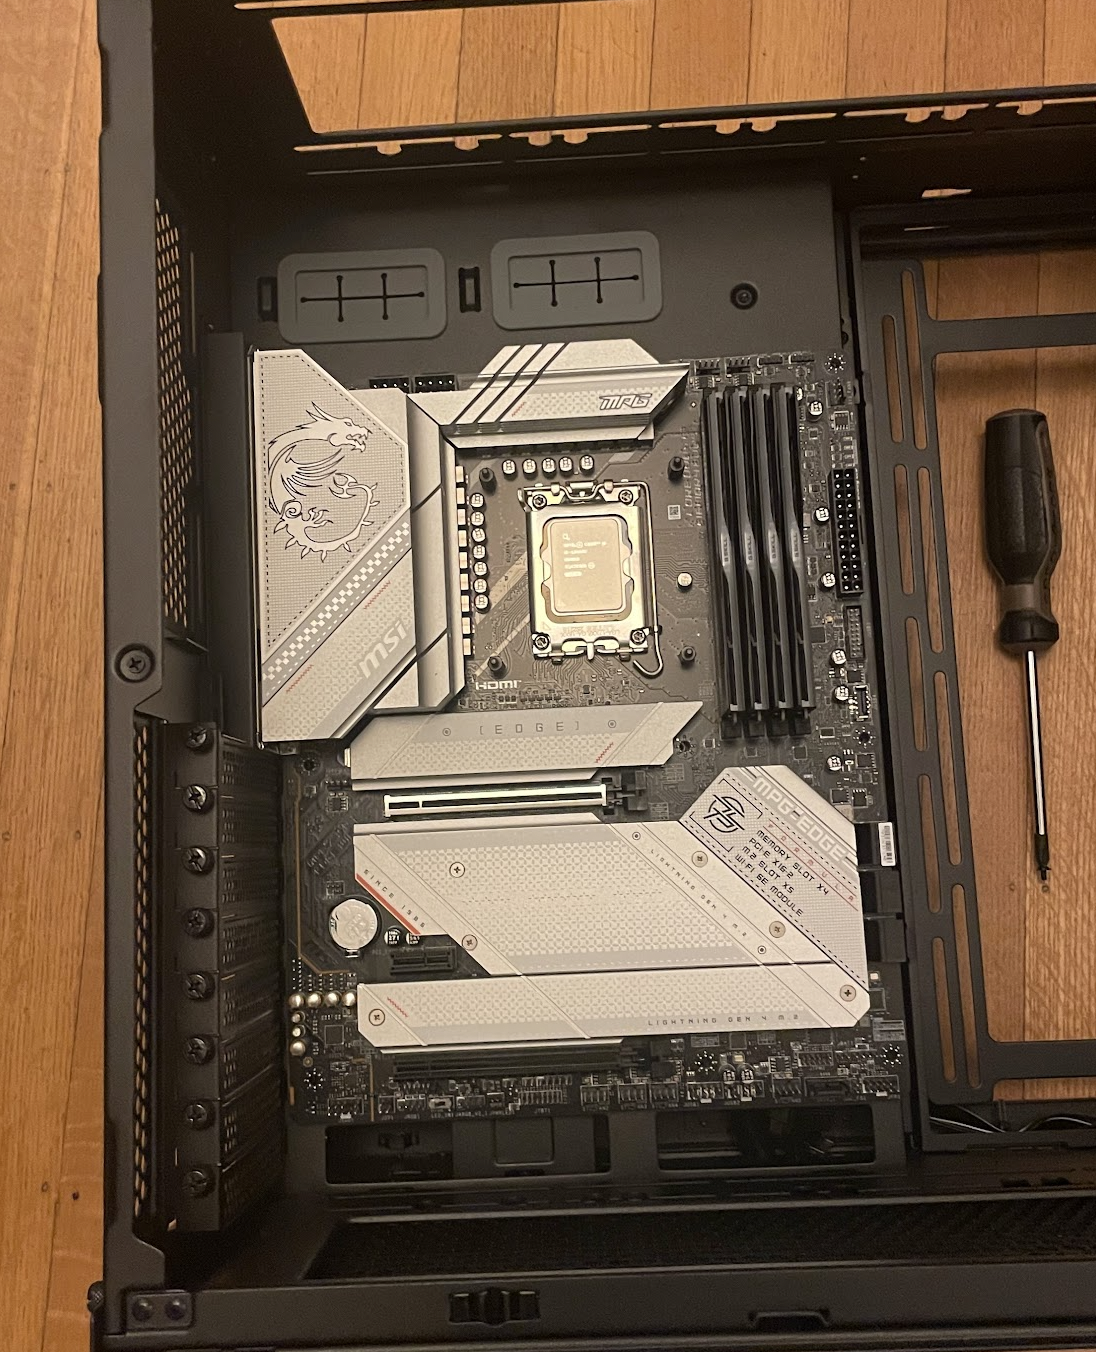
- Motherboard: MSI MPG Z790 EDGE Wifi
- Case: Lian Li Dynamic EVO
- Case fans: Lian Li UNI FAN SL-INFINITY 120 RGB Triple Pack Black
- SSD: 2TB Samsung 990 Pro
- Thermal paste: Thermal Grizzly Kryonaut (1 gram)
- Magnetic screw driver: Spec Ops Tools Phillips Screwdriver, 2 x 4", Magnetic Tip
- RGB motherboard connector: Lian Li Strimer Plus V2 24 Pin
- USB Header splitter: 9pin USB Header Male 1 to 2 Female Extension Splitter Cable Connector Adapter
Parts list: https://pcpartpicker.com/b/rZqp99
Picking the parts
When I was picking the parts for my PC build, I started by researching on PC Parts Picker. I was looking for a builds that included the RTX 4090, currently the most powerful consumer GPU. Most people seemed to be building for gaming or content production use cases, but the requirements for deep learning are not that different. The main thing is having a powerful GPU. Using PC Parts Picker, I was able to come up with a list of everything I needed and gradually swapped things out as I did more research on parts.
I got all the parts on Amazon. I considered Newegg, but heard some horror stories online about Newegg making it very difficult to return defective parts. Amazon has a no questions asked return policy, which I did end up using for one of my RAM sticks with broken RGB.
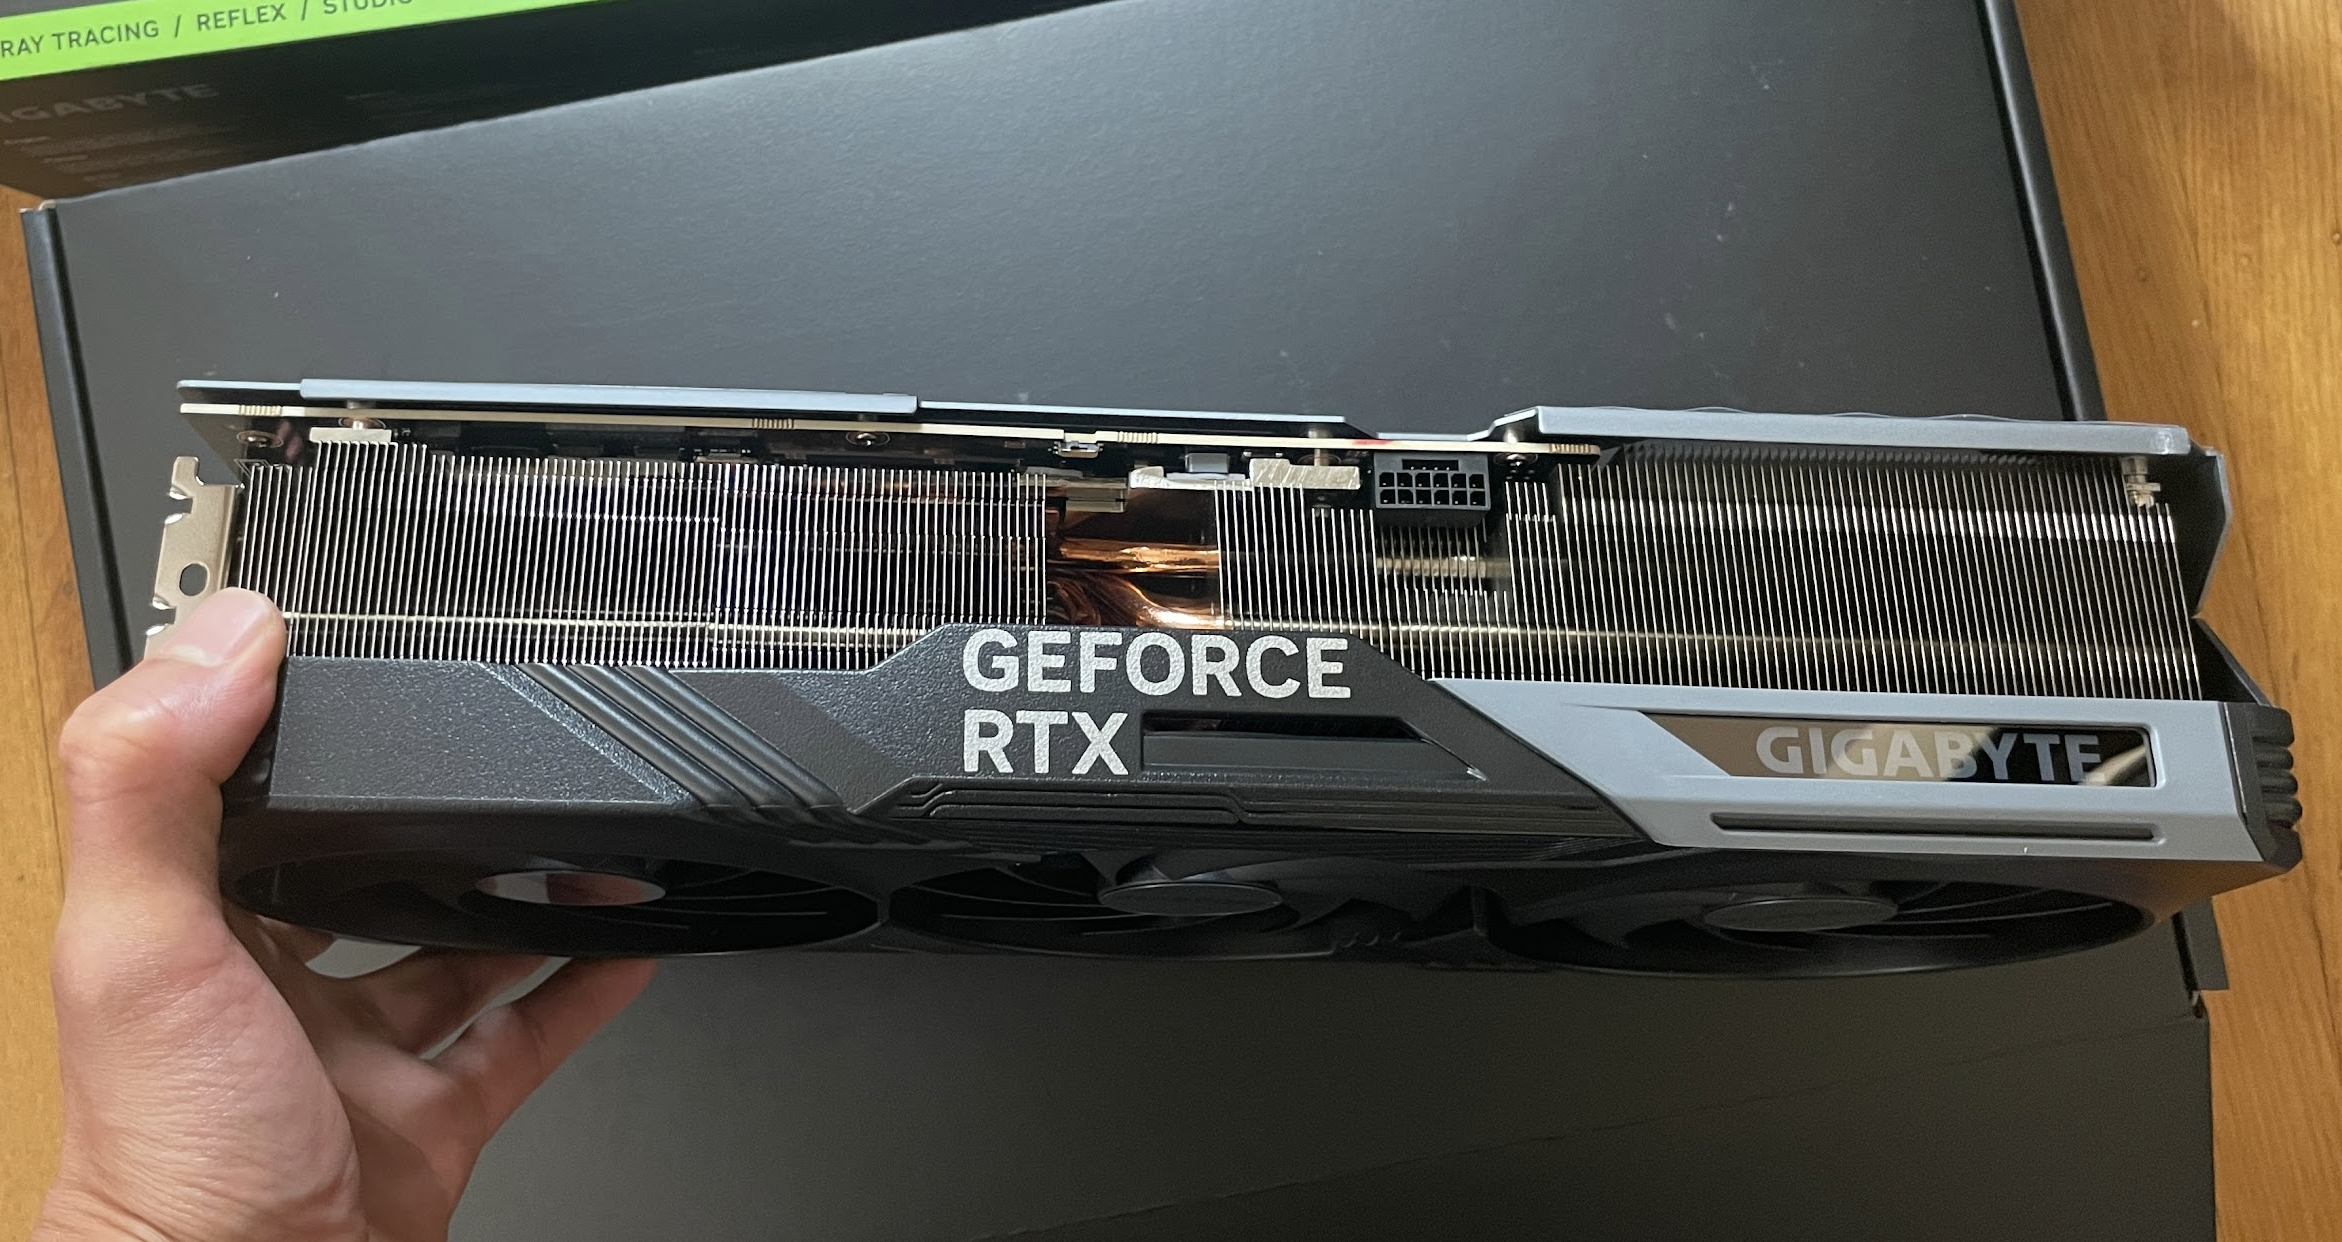
GPU
I had already decided on the RTX 4090 as the centerpiece of my build. The only alternative would have been the RTX 3090, which has 50% fewer CUDA cores and lower performance in training throughput, as well as being less power efficient. However, the 4090 has the same amount of VRAM as the 3090, and costs about $1600 vs $1000 for the 3090.
The choice was mainly between the top-rated 4090 cards on Amazon, and I ultimately decided on the Gigabyte 4090 due to its positive reviews and quick shipping.
CPU
The decision was between Intel and AMD, specifically the Intel 13900K versus the AMD 7950X. The general consensus is that AMD provides better value for money but runs hotter. Although the 7950X used to be about $100 more expensive, the prices are now the same. While Intel has 8 more cores, AMD has a 5nm TSMC chip and a larger L3 cache, which can benefit machine learning workloads.
In the end, I chose the 13900K, but I would have chosen AMD if the prices were the same. For machine learning use cases, most of the load will be on the GPU anyway. Although the AMD Threadripper is the absolute best CPU for machine learning, its price tag of over $1k is prohibitive for hobbyists.
Motherboard
This one took a lot of research. My criteria were to find a motherboard that supports the Intel 13th gen chip, DDR5 RAM, and has built-in wifi, and is also reasonably future-proof. I initially started looking at the ASUS ROG Strix Z790-E, but some concerning reviews about reliability swayed me to look elsewhere. I really didn’t want to flash the bios to enable the motherboard to work with the latest Intel chip, but that seemed unavoidable unless I was willing to shell out for the most expensive motherboards. Eventually, I landed on the MSI MPG Z790 EDGE WIFI, which had solid reviews and offered good value for the price.
For those with a larger budget who want a 2x 4090 setup, you’ll need to consider a motherboard that supports two GPUs. This will also require a larger power supply and case, and possibly a beefier CPU like the AMD Threadripper for the additional PCIe lanes.
Case
This was a bit tricky. The 4090 is a huge card, so I needed a case that could contain it and be reasonably easy to build in. Several builds on PC Part Picker used Lian Li cases. While I liked the idea of going with the smaller Lian Li Dynamic Mini, the build seemed too adventurous for me. The last thing I wanted was to have to start over because something didn’t fit in the case. So I went with the Dynamic Evo.
RAM
Pretty easy choice here. I knew I wanted DDR5, which can be 50% faster than DDR4. I went with the G.Skill Trident Z5 since it was a popular option.
Power supply
The 4090 requires at least 450W. The i9 pulls up to 253W. So I went with a 1000W power supply. The Corsair I landed on is also fully modular, which made it easy to only connect the cables I actually needed.
SSD
This was an easy choice. I definitely wanted an NVMe for my main drive, and the Samsung is known to be reliable.
Assembly
Recommended Tools:
- Phillips #2 Screwdriver with magnetic tip. The magnetic tip came in really handy to pick up tiny screws.
- Zip ties. I got a variety pack from Amazon. Didn’t end up using too many, but good to have on hand.
- A bowl to hold loose screws.
- A bright work lamp.
- Optional:
- Anti-static wrist strap. I had this and started using it, but it was pretty restrictive to have on and I ended up doing most of the build without it.
Updating the BIOS
The first critical task I tackled was updating the BIOS on the motherboard. Thankfully, this process was pretty straightforward. There are numerous Youtube videos describing the process for any given motherboard.
During the process, I noticed that the PSU showed no signs of life when connected to the motherboard, which gave me a moment of concern. I thought I received a defective unit and decided to test it using the “paper clip test.” When the PSU fans roared to life during the test, I realized they don’t activate unless under load.
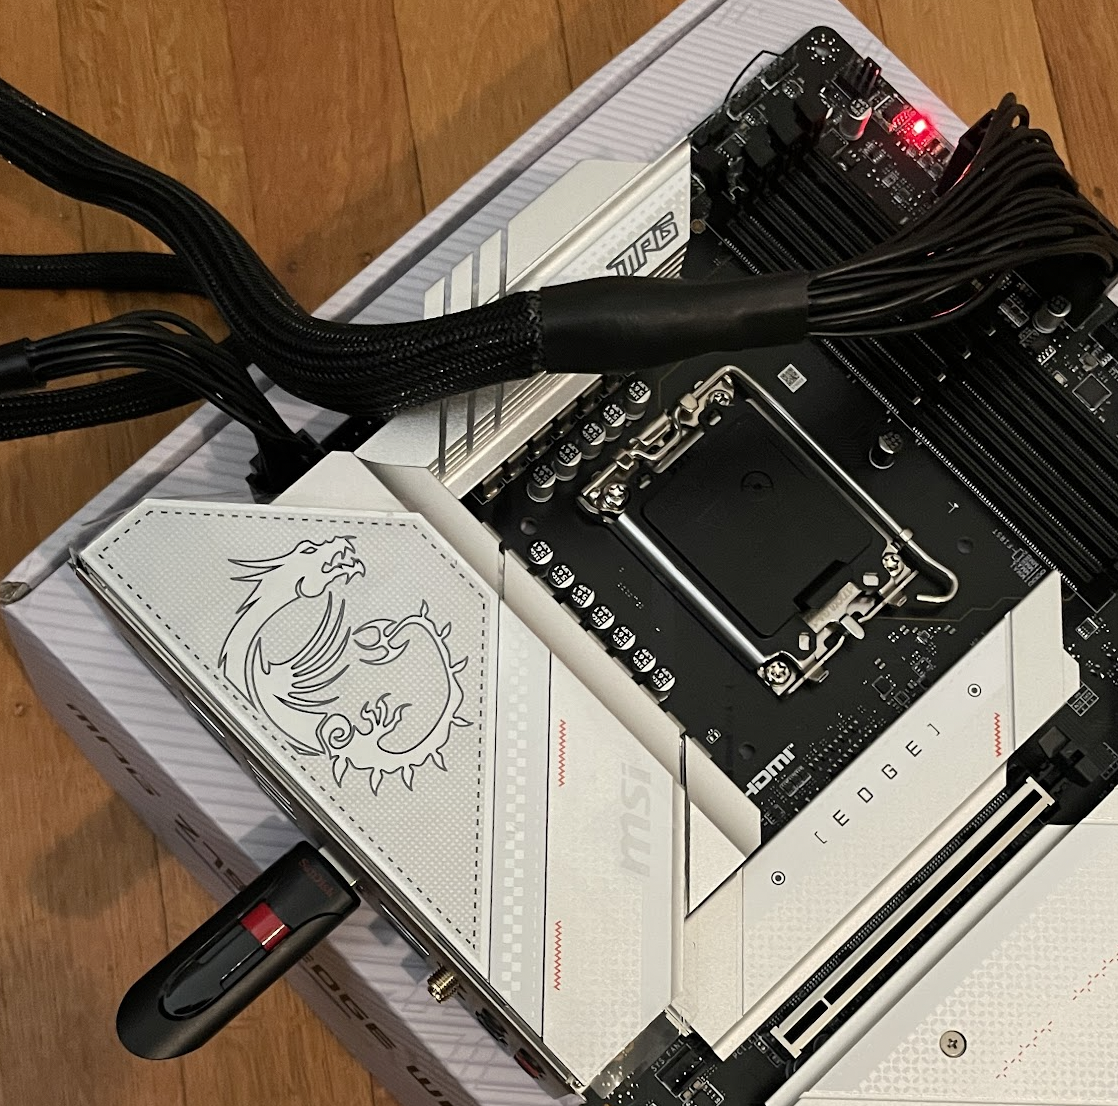
Installing the CPU
Next on the list was the CPU. The process was smooth and relatively easy to execute. It’s a simple matter of lining up the arrows on the board with the ones on the chip. It is a delicate process though, make sure you don’t bend or touch any pins or get dust in the socket or the chip.

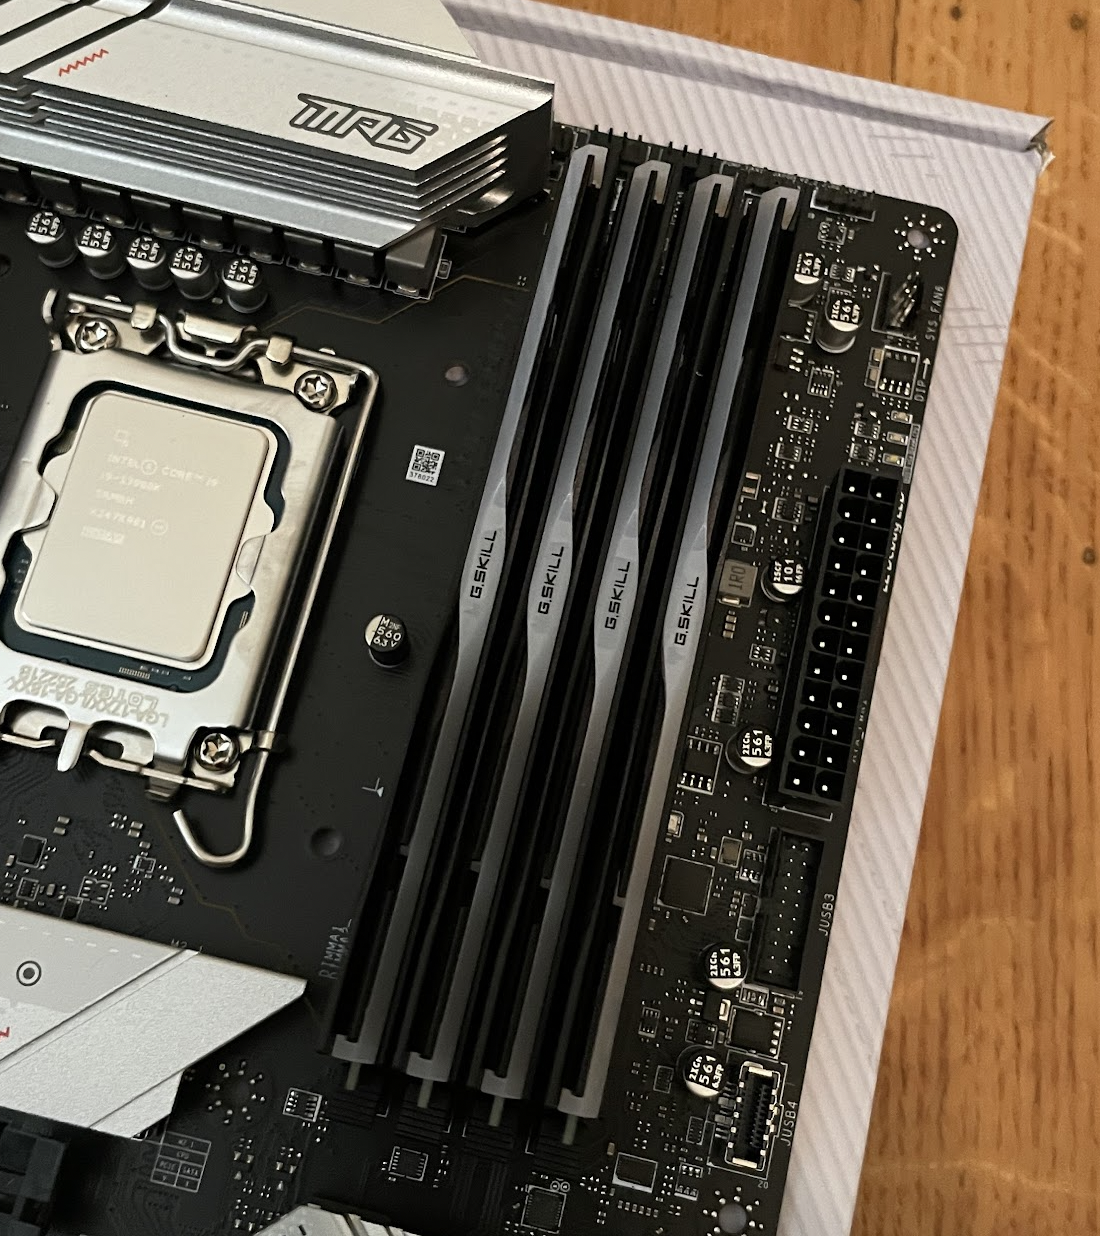
Snapping the RAM Into Place
Installing the RAM was literally a snap. The only product defect I ran into during the build was that one of my RAM sticks did not light up. I was able to get it replaced via Amazon very easily with no questions asked.
Aside on overclocking: The RAM advertises a top speed of 6400 MHz, but by default was only 4000. I was unable to get Windows to start after setting the speed to 6400 in BIOS, the highest I was able to get to was 5600 MHz. This resulted in a 10% performance increase on the Time Spy 3d Mark test.
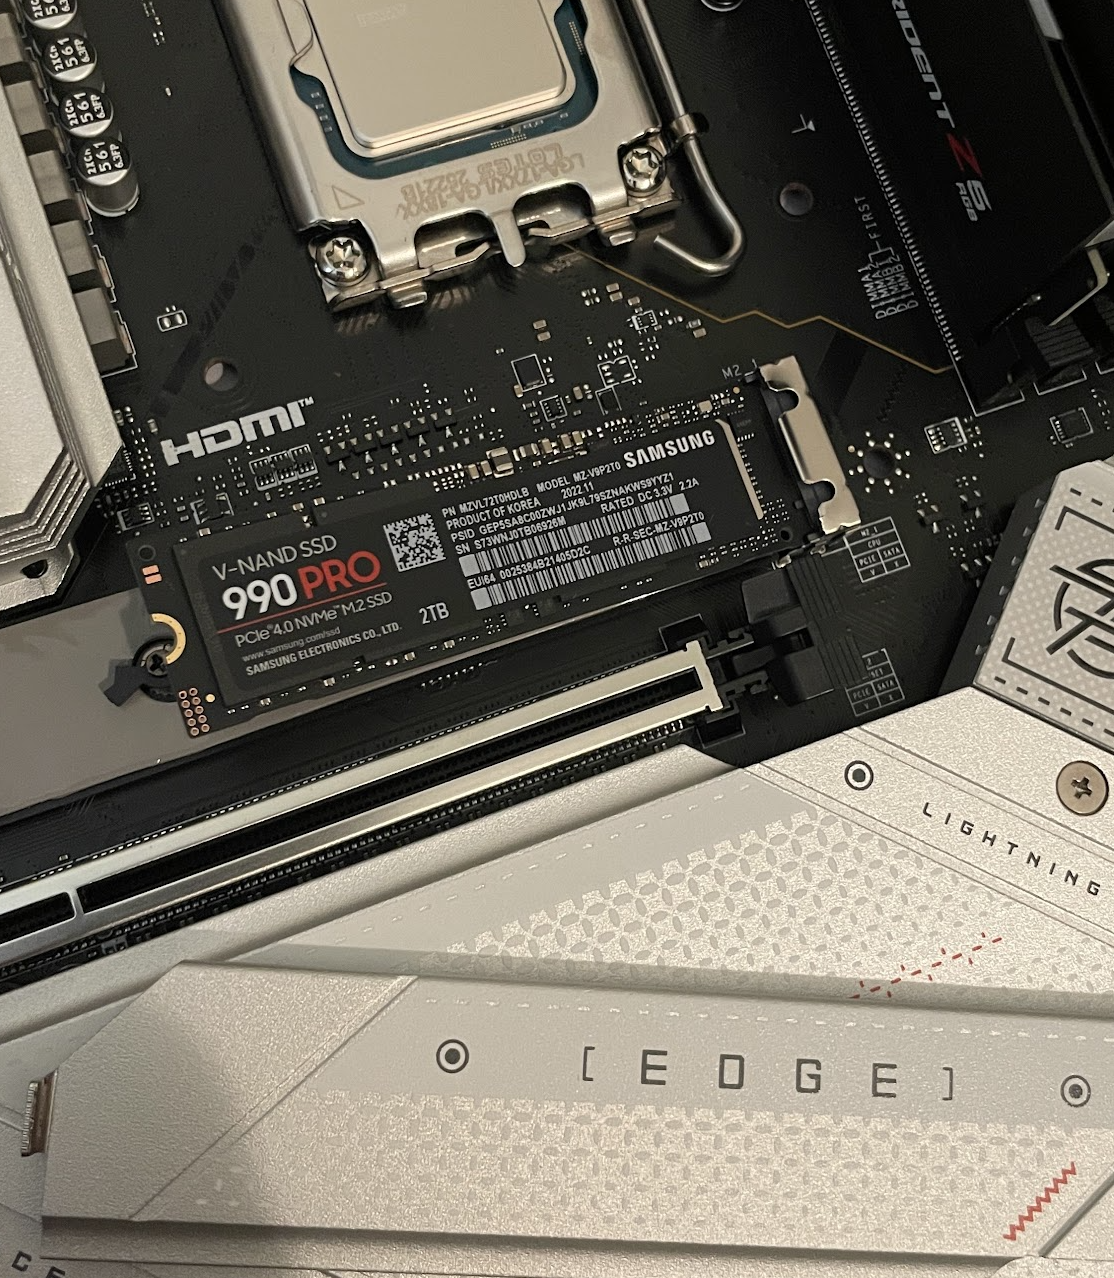
NVMe SSD Installation
I had to look up how to remove the cover on the motherboard for the SSD slot, but after that it was just a matter of screwing the SSD into place.
Case Setup
This is where things got somewhat hairy. The Lian Li case instructions are not super clear, and there are a million parts to deal with. It really helps here to stay organized and know where you place every screw. Use a bowl for loose screws. Thankfully there are a few good videos on my exact case, this one was pretty good: https://www.youtube.com/watch?v=2v2fd1nrnkY
Important: Most CPU coolers require attaching a plate to the back of the motherboard. Do this before screwing the motherboard into the case to avoid any unnecessary backtrack.
Once the case was prepped, I screwed the motherboard into place.
Case Fans
This probably took the most time. I had to spend quite a bit of time thinking through fan placement. I had ordered 10 Lian Li SL-Infinity fans, by far the most case fans I’ve ever put into a PC. There’s some theory on the best fan placement to reduce dust build up and improve airflow. I ended up going with three intake on the bottom and three on the side, and three exhaust on the top and on in the back. I originally had the reverse setup, but the rear intake would just suck in hot air from the CPU. I miss out on the cool RGB effect of the fans on the side, but I think it’s worth it for the improved airflow.
The nice thing about the Lian Li fans was that they daisy chain pretty easily, so a set of three fans could be powered by a single cable. That cable then connects to a central hub that can be connected to up to four sets of fans, which is powered by a single cable from the power supply. The one issue was I had a hard time figuring out which side was the face (intake). It turned out that in my version, the mirrored side is the face. Lots of screwing fans in and out involved.
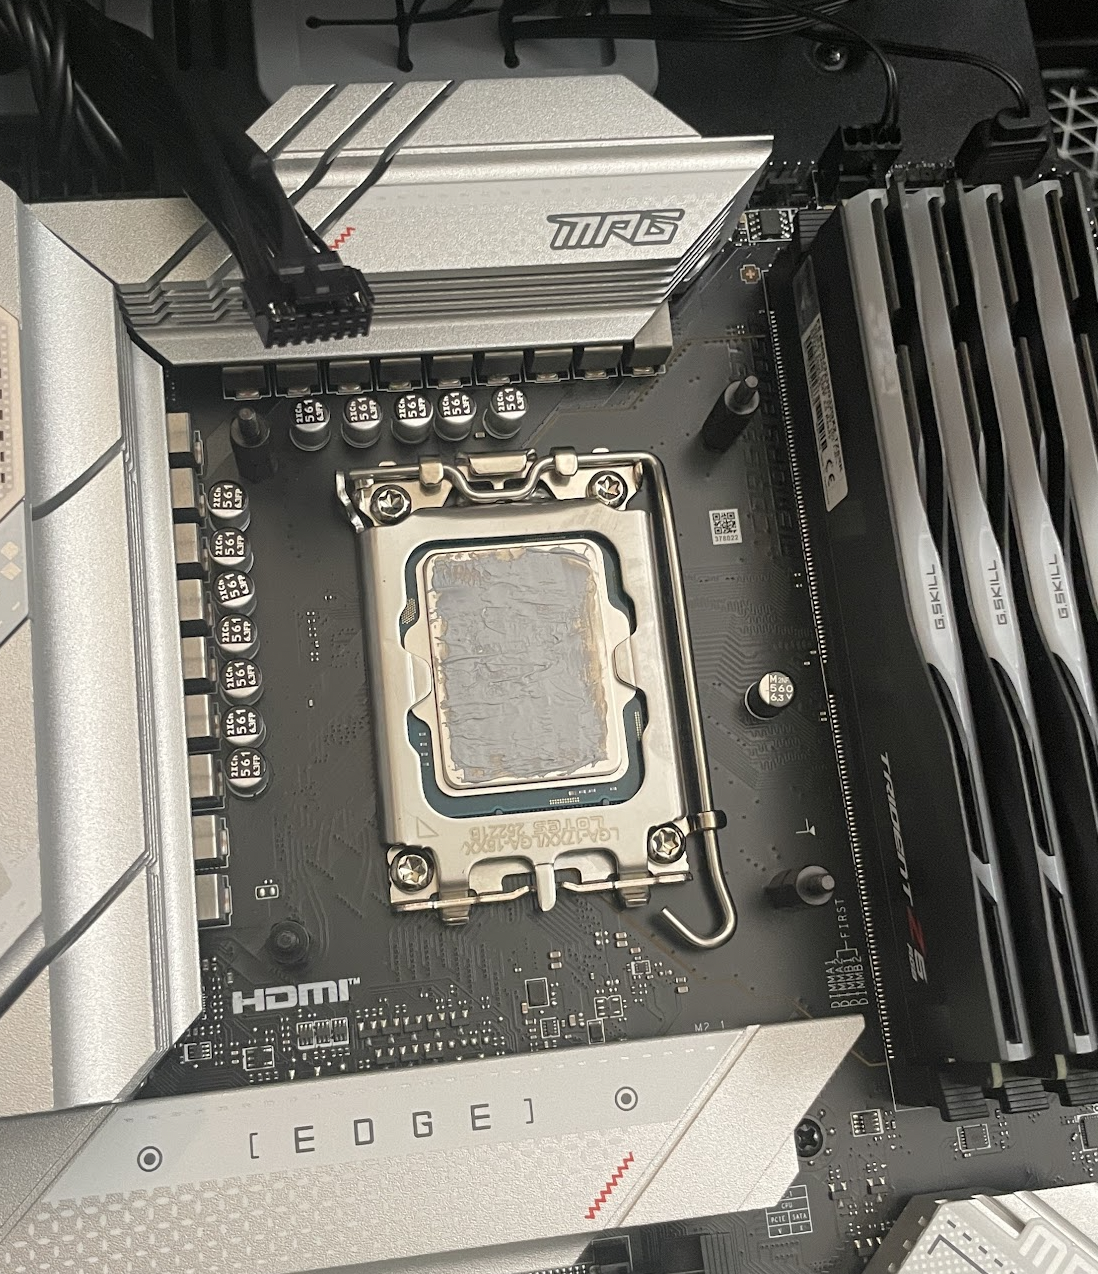
Applying Thermal Paste
Once all the fans were in place, I was ready to apply the thermal paste. The NZXT CPU cooler came with some preinstalled, but I saw it’s recommended to apply your own. I went with the technique of manually spreading the paste with the provided tool.
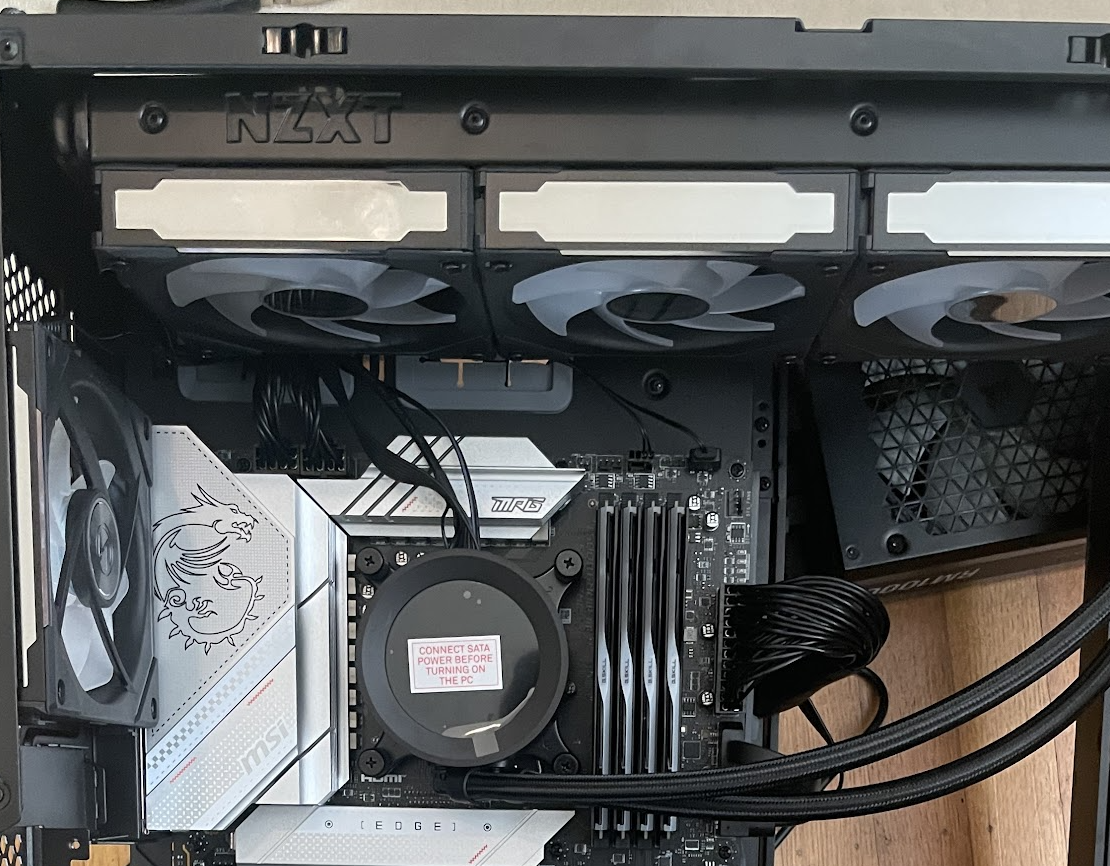
Installing the CPU Cooler
The NZXT Kraken Elite is an “all-in-one” liquid CPU cooler that pumps cold liquid to the CPU and warm liquid back through a radiator. It comes with its own fans, but they did not work well with the Lian Li fans. The Kraken fans require their own controller hub, and the RGB did not sync well. Additionally, I had run out of RGB slots on the motherboard, so I used the Lian Li fans on the NZXT filter instead.
Putting the head of the cooler on the CPU was actually pretty easy.
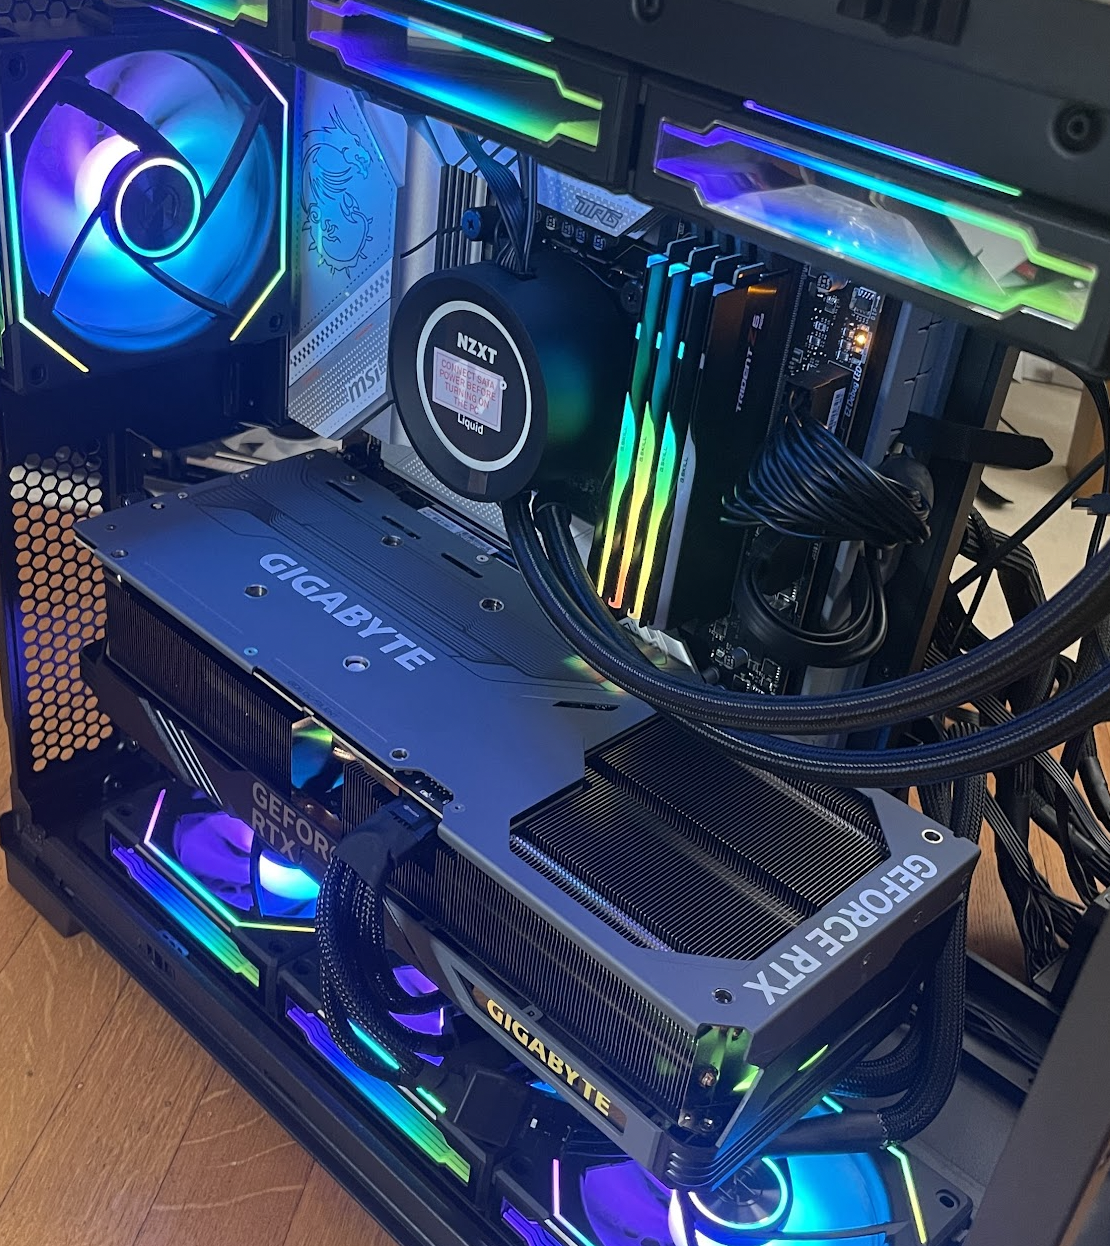
Fitting the GPU
The 4090 is a beast of a GPU, taking up 3.5 PCIe slots. Thankfully it fit in the case with plenty of room. Installation proved pretty easy. Apparently the Lian Li case allows for vertical mounting of the GPU with a supplied bracket, but I didn’t really want to bother with that.
I got scolded by folks on PC Parts Picker for not installing the GPU bracket. This was included with the Gigabyte RTX 4090, but I avoided installing it because my JUSB4 connector was too big and blocked the top part of the bracket. The GPU also seemed stable enough without it. However, it seems that the GPU is so large that overtime it will sag and potentially break the PCIe slot or the GPU itself. I ended up installing the bracket after all, I can live without a front panel USB-C port.

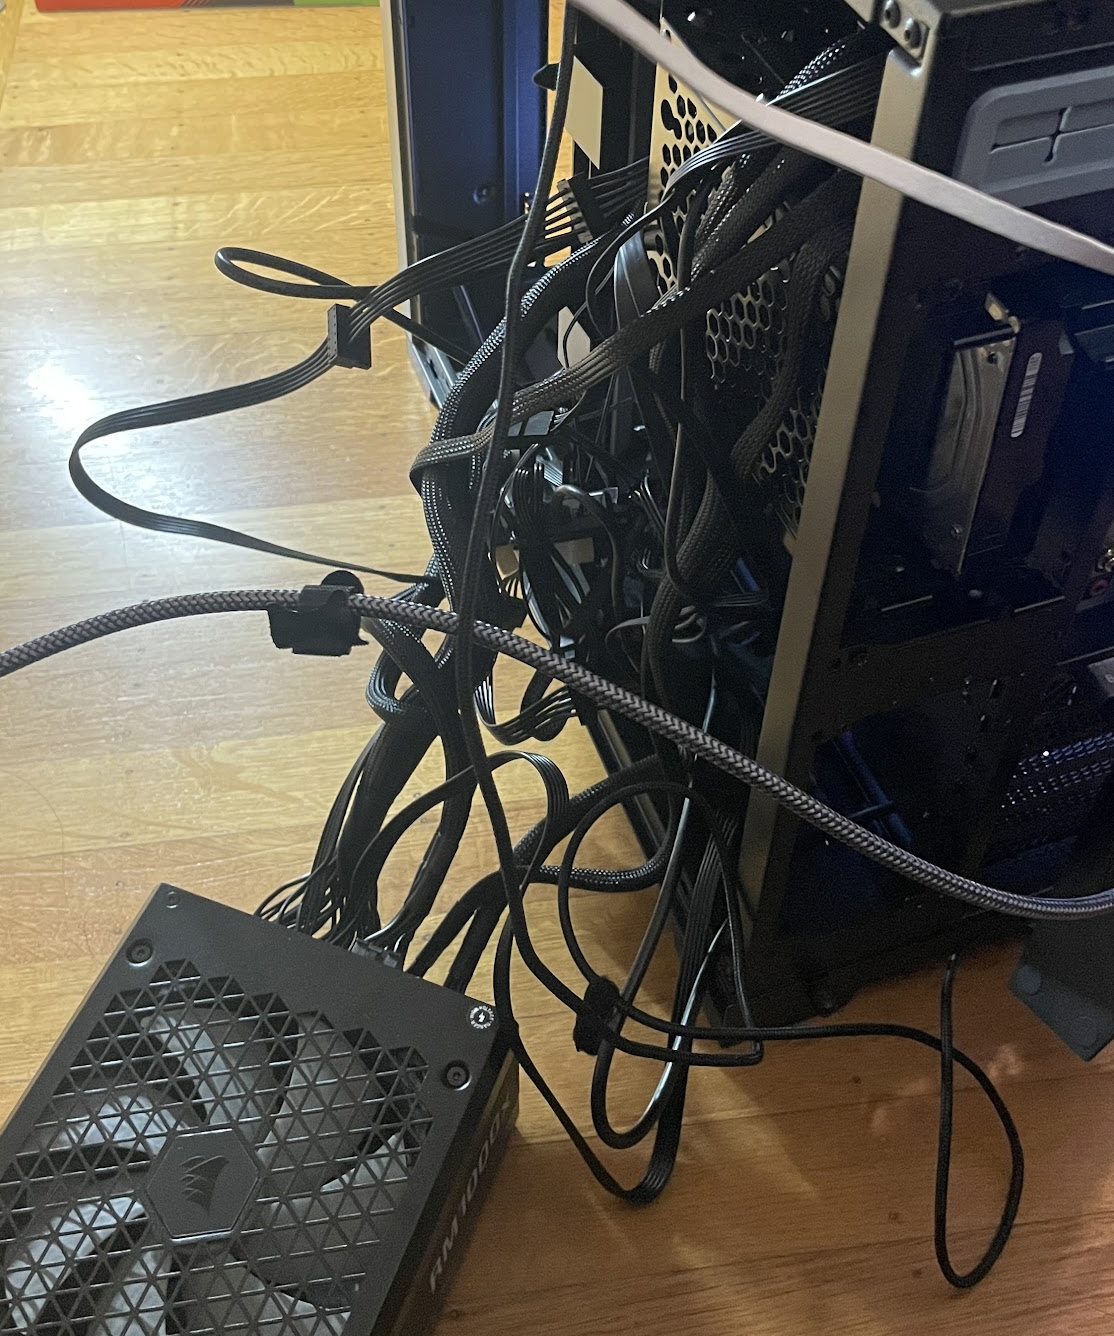
Connecting Power Supply
Since I got a modular power supply, I had to figure out exactly which cables I needed for all of the components. I hooked up the required cables to the power supply and routed the cables through the holes in the case to the components.
Test Run
At this point all of my main components were in. I connected all of the various wires to the motherboard. This was pretty easy because as long as you read the labels and connect the wires to the matching pins without forcing anything, it’s basically like legos.
Thankfully nothing blew up when I flipped the switch. I made sure that the computer booted up properly before moving on to cable management and cleanup.
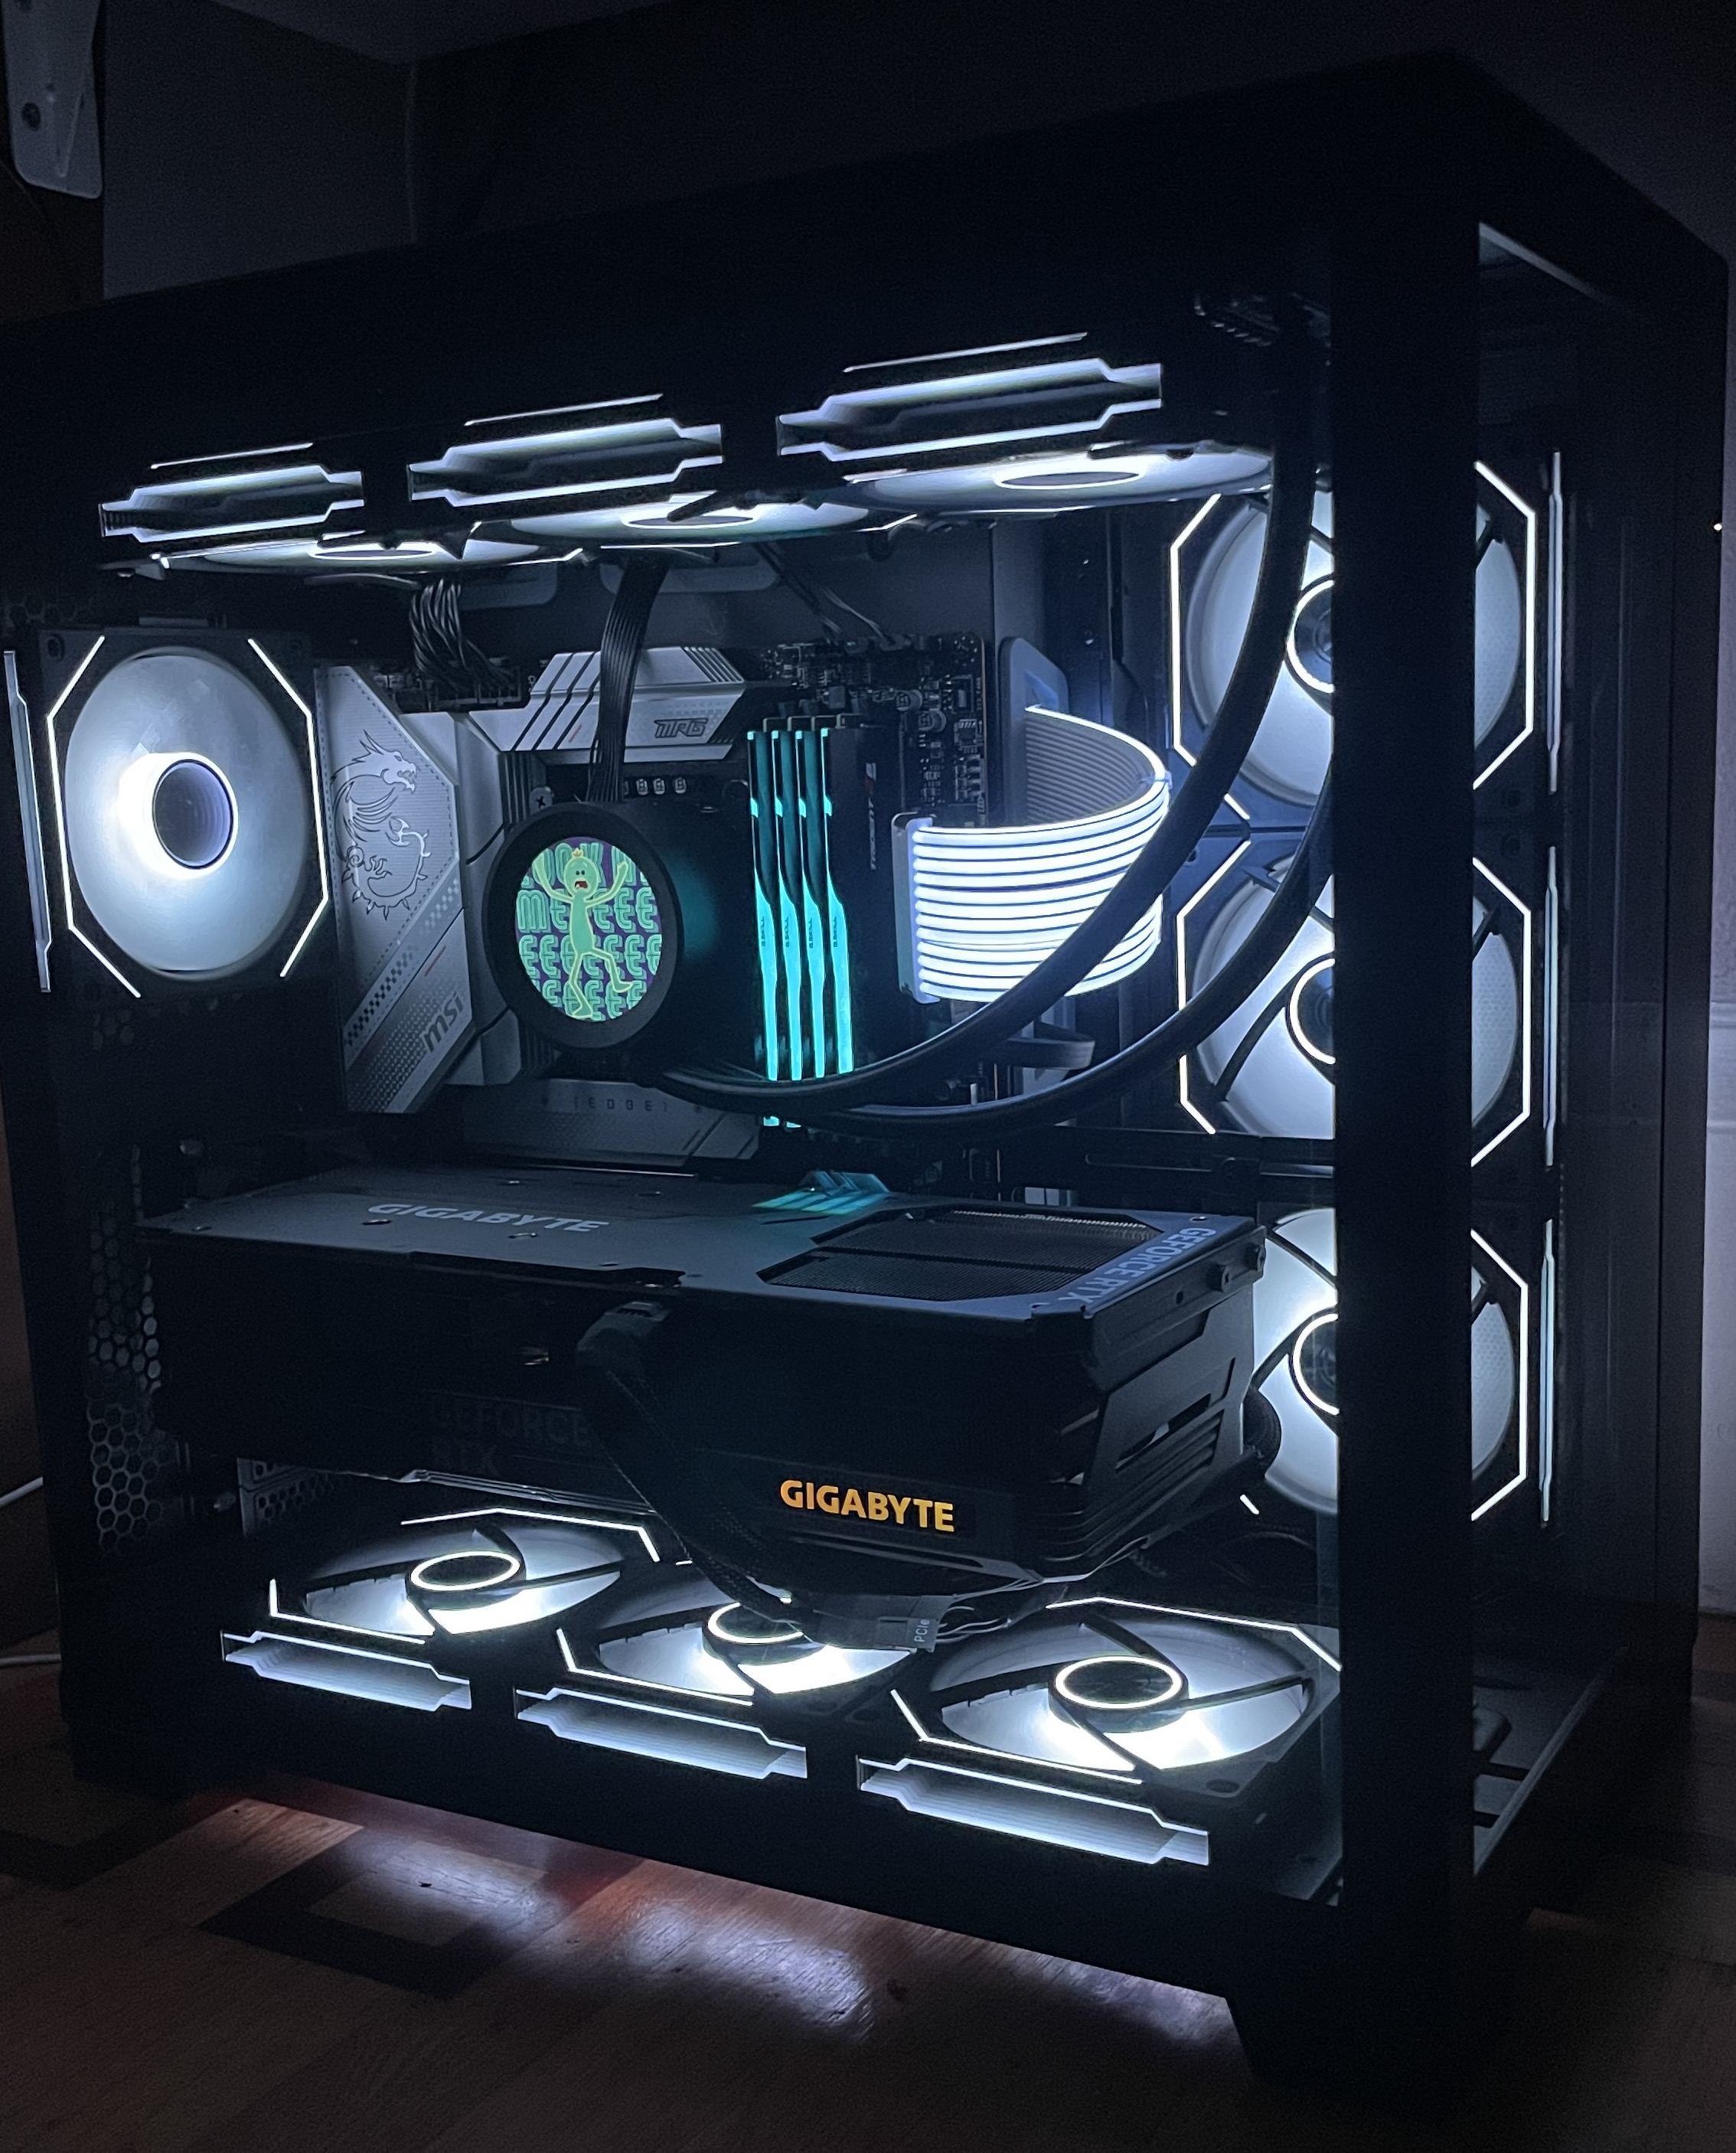
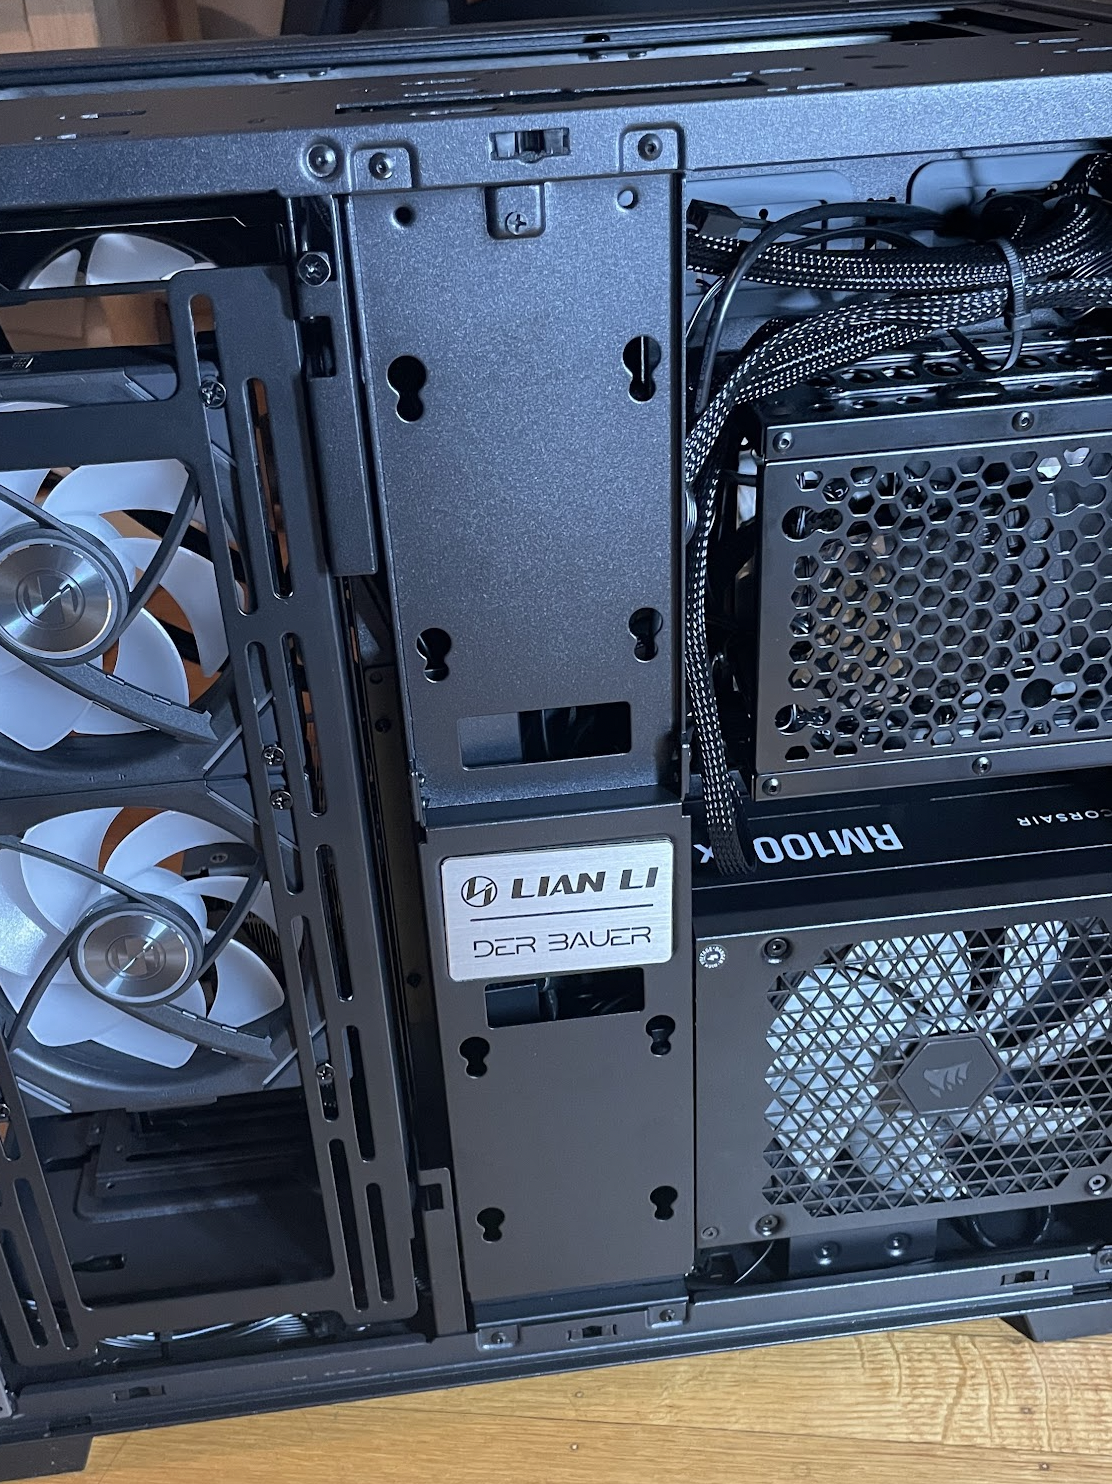
Cable Management
Managing the cables turned out to be relatively straightforward with the Lian Li case. All cables could be hidden at the back and fed through rubberized slots around the motherboard. After organizing the mess, a provided plate neatly covered the center gap in the case.
More pretty RGB
After the build was complete, the RBG bug got me and I decided to get an RBG motherboard connector. This required a USB connector splitter, since I was out of USB slots on the motherboard. I also needed another Lian Li controller hub since I’d used up the four on the current controller. The result is a programmable RBG motherboard connector. This does absolutely nothing but feed my vanity and was cool for about five minutes. Pretty lights!
Installing Windows and Drivers
You’ll need to create a bootable Windows USB on another Windows PC. I thankfully have Parallels Desktop on my Mac, so I was able to do this pretty easily. You also need a wired Ethernet connection and wired mouse and keyboard, since wifi and bluetooth don’t work without the necessary drivers installed. Once you get through the Windows installation process and install the drivers, you should be good to go!
Benchmarks
Cinebench

3d Mark
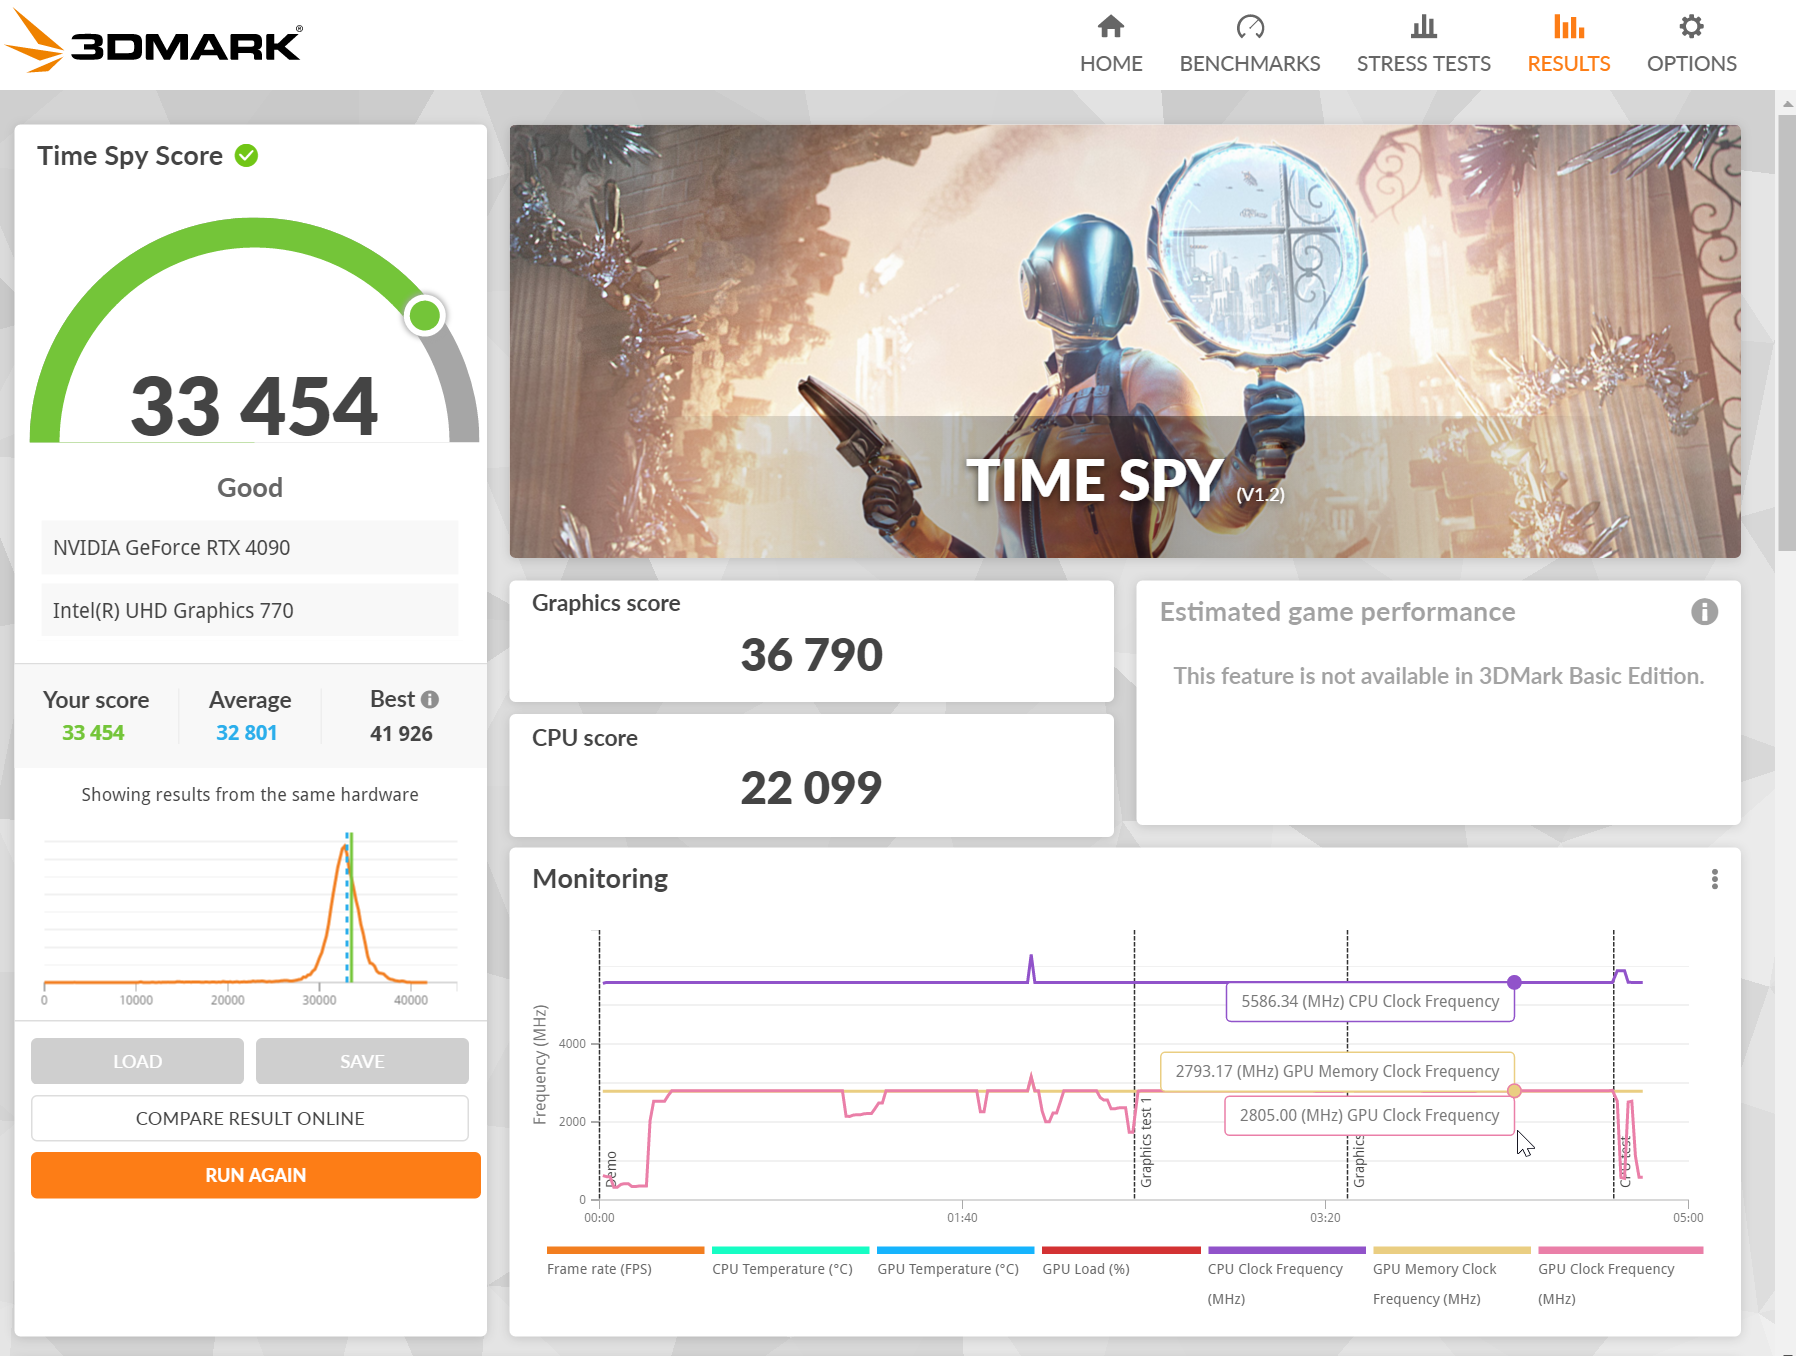
https://3dmark.com/spy/39191470
Generative AI performance
Stable Diffusion
This thing can crank out basic 512x512 images in seconds, much faster than what my M1 Macbook Pro can do. I do run into CUDA out of memory errors if I try to upscale images too much, but for rapid iteration it’s great.
 img2img of a screenshot of the completed build, with prompt: “futuristic cyberpunk gaming computer,neon,4k,highly detailed,large graphics card,water cooling,glowing
LLAMA
I’m able to load llama-7b fully on the GPU, and inference is very fast. The generated text is trash. Llama-14b requires putting some layers on the CPU, slowing down inference substantially, and the larger models are basically unusable. This is where a dual GPU setup would be nice. As LLMs get more efficient, I think this will be less of an issue.
Final Thoughts
After several years of working with disembodied infrastructure in the cloud, there is something refreshing about working with physical hardware larger than a Raspberry Pi. Going through this experience was definitely a great learning opportunity, and I recommend doing it yourself if you have similar requirements. I hope you found this useful as another data point in your research.